There are two ways you can track what you have borrowed from the library:
-
Borrowing History automatically lists all the items you have borrowed. You will need to turn this feature on.
It only records physical items like books and DVDs, not digital items like eBooks, downloadable audiobooks, and streaming video. Libby, BorrowBox and uLibrary automatically keep your loan history. -
Completed Shelf keeps a track of what you have read. You will need to add titles yourself to this shelf, and there are various ways you can do this.
Find out how to add items to your completed shelf.
Borrowing History
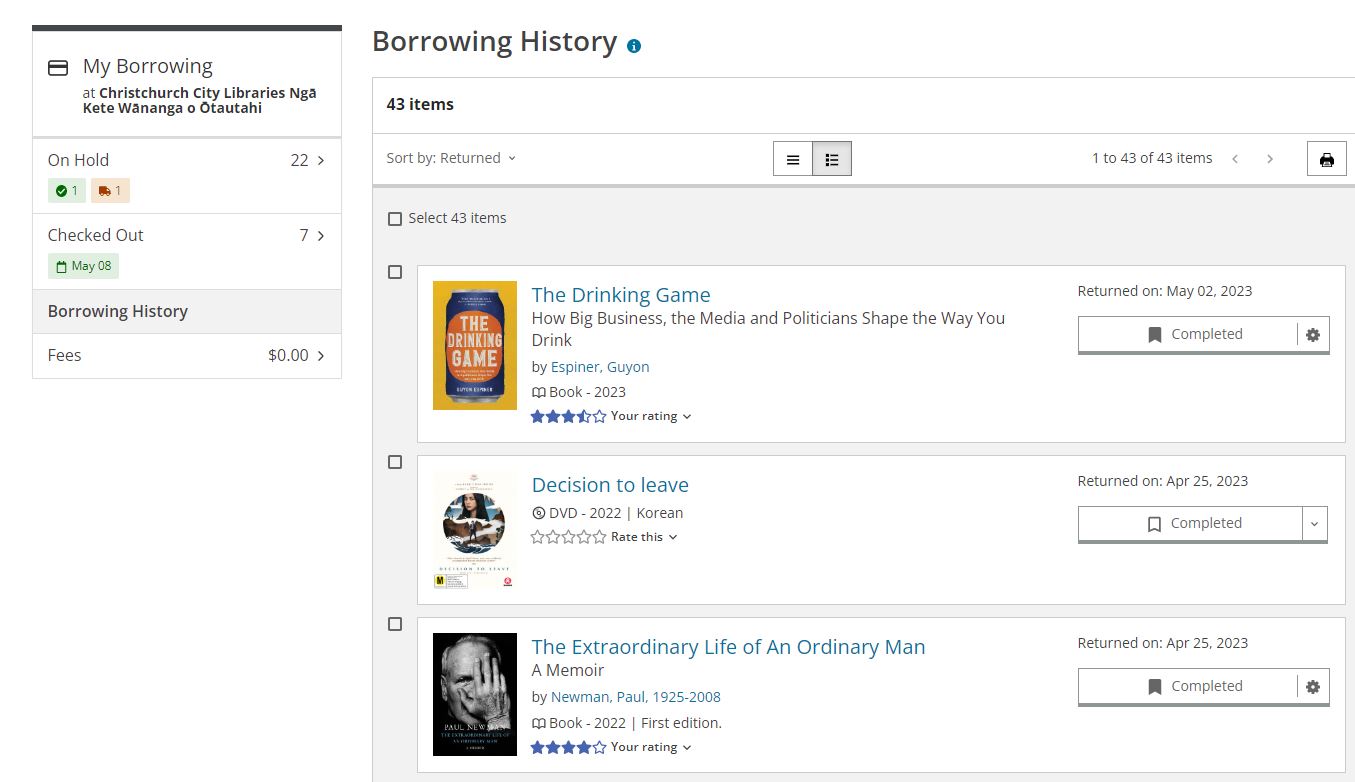
You can check Borrowing History when you log in to your account. It automatically tracks physical items borrowed from and returned to the library. You need to turn it on to activate your borrowing history. Digital items — eBooks, downloadable audiobooks, streaming video — are not stored in borrowing history.
Note: You can sort borrowing history by returned date, title, author or format, if you have 100 titles or fewer. When borrowing history has more than 100 items, sorting is removed. Because BiblioCommons doesn't store the information, the page load time would be unacceptably slow.
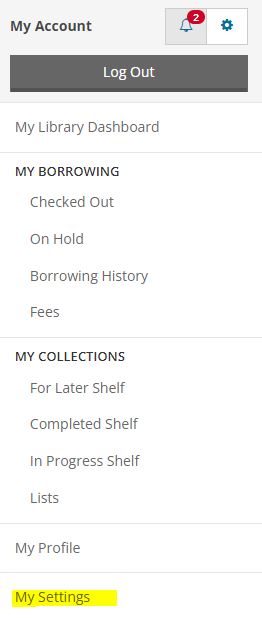
Login to your account and select My Settings.
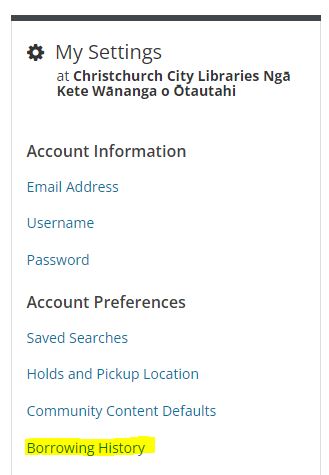
Then select and enable Borrowing History in your Account Preferences.

Books, DVDs, and other items you return to the library will then start to be recorded in your Borrowing History.
You can check your Borrowing History in your account.

You will see the Recently Returned titles from your Borrowing History first.
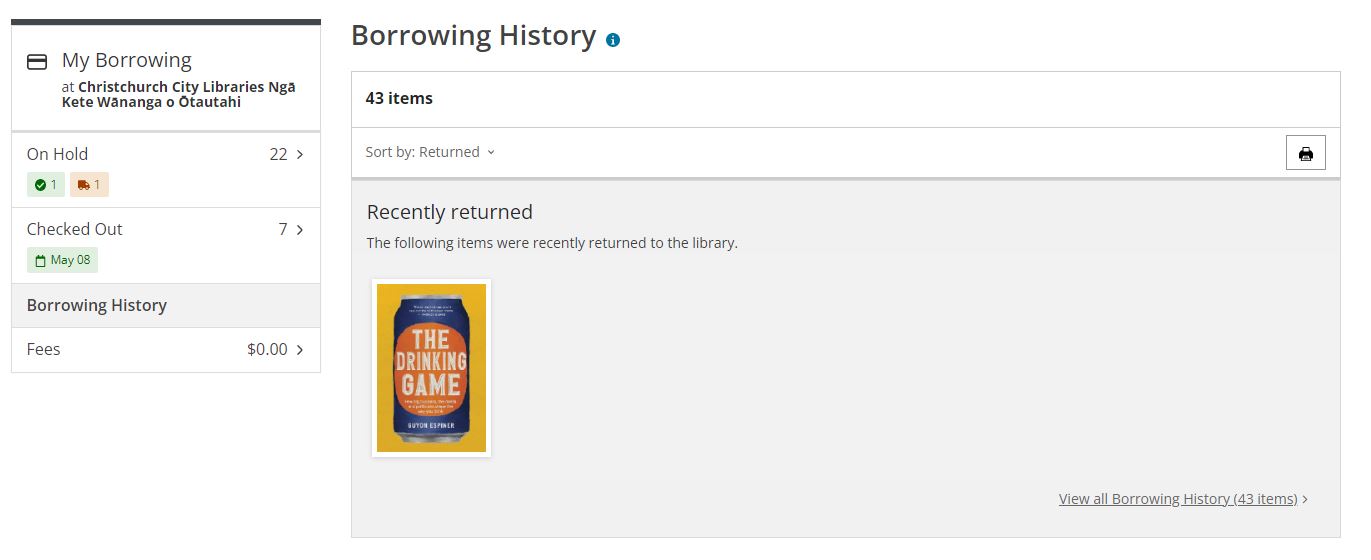
To see more, select the View all Borrowing History option.
Add a title to your Completed Shelf
Another way to keep track of the books you have read is to add titles to your Completed Shelf.
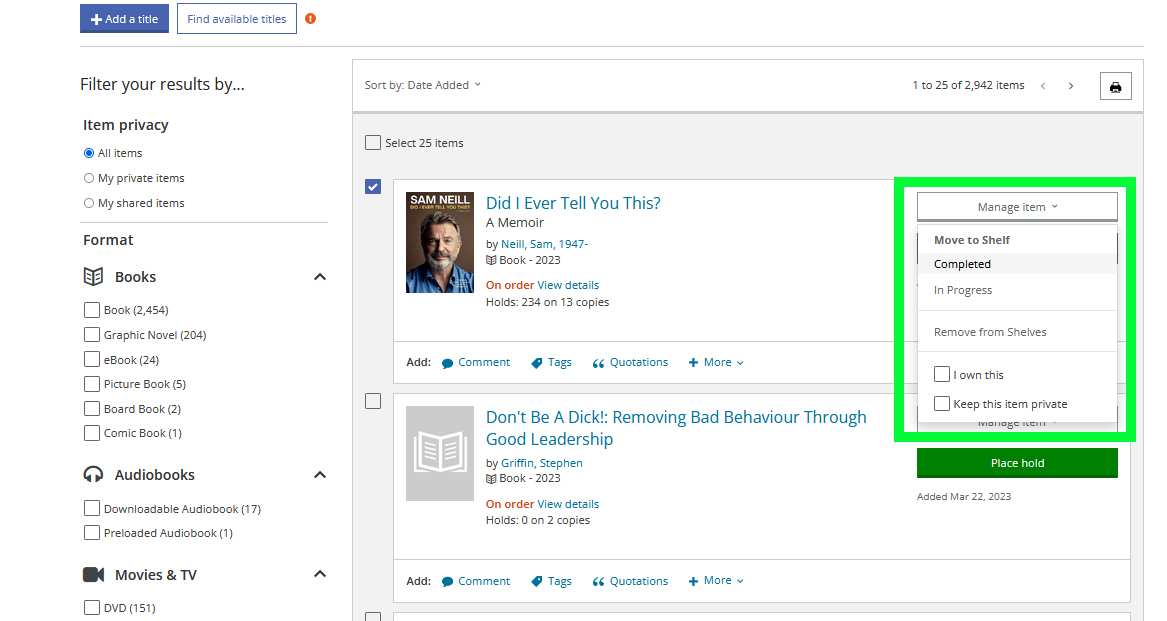
Items are added to your Completed Shelf automatically if you add a rating or comment.
You can add titles manually by clicking the Add to My Shelves link from search results, or a title’s details page.
If you are on your Completed Shelf, you can click the Add New Title link, and then search for the title you want to add.

Any item you add to one of your shelves remains there until you remove it, even if the library no longer owns it.
How to use your Completed Shelf
When you are viewing your Completed, In progress, or For Later shelves, use the categories in the left sidebar to filter. For example, you can filter your For Later shelf to show only DVDs you want to watch, or see all the graphic novels in your Completed Shelf.
By default, titles are sorted by the date you added them, most recent first. By clicking the Sort by dropdown list at the top of the page, you can sort by date added, title, rating, or author.

Add books you own to your Completed Shelf
You can include your own books on your Completed Shelf.
If the title is in your library’s catalogue, find it and add it, as above. If the library doesn't have it, try using lists to find the title and add it from there.
Go to your shelf (Completed, In progress, or For Later) and use the Manage item menu to mark a book "I own this".