Computers FAQs

  • General Questions

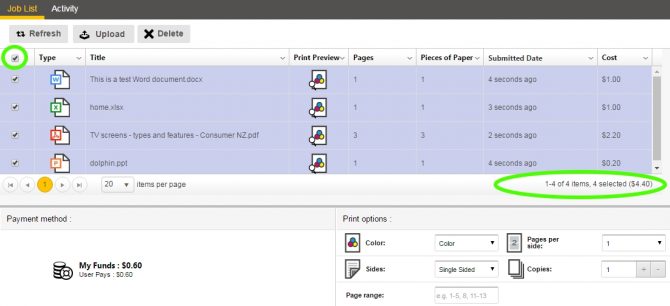
    There is no charge for booking and using a library computer. Pharos is used for managing the booking and for payments for printing and copying.

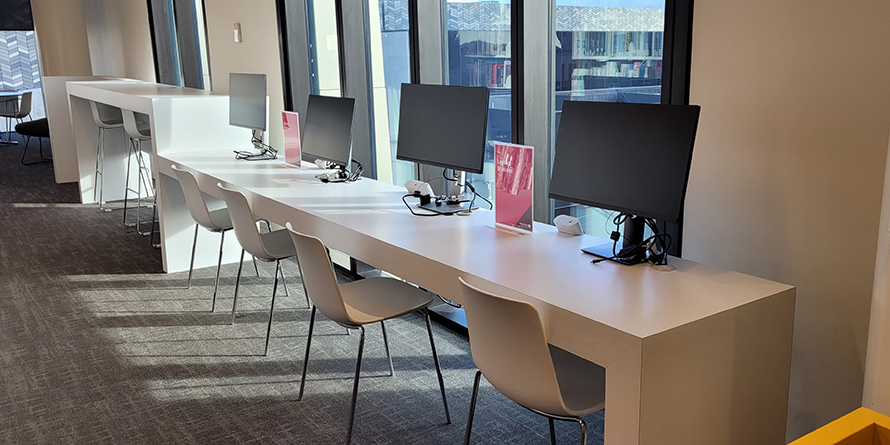
    If a public computer is available, you can walk up and log in using your library card or a visitor slip. If all the computers are in use then you can log into a Pharos Station to reserve the next available computer. You can ask a staff member to help you make a booking.

    For library members, there is no limit to the number of sessions you can have if computers remain available. Visitor slips are available to non-members and allow a maximum of 30 minutes a day computer use.

    Computer sessions are for a maximum of 60 minutes for library members and 30 minutes for visitors. Some libraries have shorter session time options available. 

    When you reserve a computer

    • If you are more than five (5) minutes late for your session the computer becomes available for other customers.
    • When your computer is available, your library card number will be displayed on the screen of that computer.
    • Some locations will also have a queue screen showing you this information. You should check it to see when a computer is ready for you.

    Warnings when your time is nearly done

    While you are using the public computer, you will be given warnings when you have a short amount of time left:

    • Ten minutes to go
    • Two minutes to go.

    If you are a library member, your computer session may automatically extend if no-one else is waiting to use the public computers. If the computers get busy, you will receive a two minute warning before your extended session ends.

    Save your work

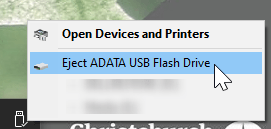
    You must save your work before your session expires, or else it will be lost. Save online or to USB memory drives which are available to purchase at the library.

    You will need a Pharos account to add yourself to the queue for a library computer. Once you have an account you can add yourself to the queue at a Pharos station in the library.

    • You can only be on the queue for a computer at the library you are in. You may not add yourself to the queue at one library for another library.
    • You may not add yourself to the queue in advance.
    • You will have to complete your first queued session before you can add yourself to the queue again.

    There is no charge for adding yourself to the queue and using a library computer - Pharos is just used for managing the queue and for payments for printing/copying.

    Pharos queues at Tūranga

    Because Tūranga has public computers available over five floors Pharos queues will work in the following way -

    • You can log on to a Computer Reservation Station located on floors 1, 2, 3 or 4 with a Library Card or Visitor Pass to reserve a Free Internet computer.
    • Pharos will reserve a computer on the floor you are on when making the reservation if one is currently available. If all the computers on your floor are in use then the system will find the next available computer on another floor.

    He Hononga | Connection, Ground Level does not have computers that can be reserved as they are walk-up and may be used for a maximum of 15 minutes only.

    Pharos is an automated computer queuing system that also provides the means for you to pay for printing, photocopying, booking library computer time and other library services and products from your Pharos account. This system ensures everyone has equal access to computers at our libraries.

    Most of our libraries have Pharos. The exceptions are Diamond Harbour, Little River and the Mobile libraries.

    Library computers for public use have an optical disk drive in the monitor stand (see image below).

    VLC software is installed on library PCs and will play most DVDs or video files. CDs may be listened to using Windows Media Player.

    Please note:

    See also

    NVDA – Non Visual Desktop Access. Free, open-source screen reader installed on our public computers. https://www.nvaccess.org/

    Information for blind and visually impaired customers using our free internet computers

    BYO Headphones

    The internal speaker on our free internet computers are disabled therefore bring your own headphones that use a standard headphone jack.

    To find the headphone jack run your hand down the left side of the computer screen. The headphone jack has a round finger size hole.

    Use Narrator at the login screen

    NVDA is not available until you have logged into the free internet computer. You can use Microsoft Narrator, the built-in Windows screen reader, at the login screen instead.

    Narrator instructions     

    • Keyboard shortcut Windows Control Enter turns Narrator on
    • Narrator will switch off when you log into the desktop, you will need to press Windows Control Enter again to enable Narrator again

    Starting NVDA

    Use keyboard shortcut Windows S to Windows Search for the NVDA application

    • Type nvda
    • When NVDA is selected press enter to run it
    • To quit Narrator use keyboard shortcut Windows Control Enter
    • To quit NVDA use the keyboard shortcut Insert Q

    Software available in Computer Lab 1, 4.22 Auahatanga | Creativity, Level 4, Tūranga.

    Your library membership gives you access to LinkedIn Learning which has tutorials on some of the following software.

    In addition to the software available on all public computers the following software is installed on PCs in Computer Lab 1:

    Animation, Effects and 3D Modelling

    • Adobe Animate 2D Animation.
    • Adobe Character Animator 2D animation with camera based motion capture and audio. Capable of live animation of characters.
    • Adobe After Effects (including Cinema 4D Lite) Layer-based digital effects, compositing and motion graphics.
    • Blender 3D modelling, animation and compositing.
    • Da Vinci Resolve Fusion (packaged with DaVinci Resolve) Node-based digital effects, compositing and motion graphics.
    • FreeCAD Parametric 3D modeller. 

    Audio Recording and Editing

    Desktop Publishing and Graphic Design

    Video Editing

    Games

    • Kerbal Space Program: Physics-based aerospace simulator and planetary exploration sandbox, including craft construction and robotic parts.
    • Simple Planes: Plane building and flying with procedural parts.
    • Simple Rockets 2: Rocket building and launching with procedural parts.
    • Universe Sandbox: Physics-based space simulator

    Other

    Software available on the computers (Macs Studios) in the Audio/Video Studio at Tūranga, Auahatanga - Creative Space at Te Hāpua: Halswell Centre, and Auahatanga - Creative Space at Matatiki Hornby Centre.

    Your library membership gives you access to LinkedIn Learning which has tutorials on some of the following software.

    Animation, effects and 3D modelling

    • Adobe Animate 2D Animation
    • Adobe Character Animator 2D animation with camera based motion capture and audio. Capable of live animation of characters.
    • Adobe After Effects (including Cinema 4D Lite) Layer-based digital effects, compositing and motion graphics.
    • Blender 3D modelling, animation and compositing.
    • Da Vinci Resolve Fusion (packaged with DaVinci Resolve) Node-based digital effects, compositing and motion graphics.

    Audio Recording and Editing

    Desktop Publishing and Graphic Design

    Video Editing

    Other

    Yes. Find out how in our page on maker spaces and 3D printing. The cost for a 3D print is 20 cents per gram of filament. 

    Use our 3D printing form to submit an .stl file for printing.

    A screenshot (also known as a screen capture, screen dump, or screen grab) is an image or snapshot of what is visible on a computer monitor or device. Screenshots are very handy for troubleshooting technical problems.

    Taking a screenshot on a Windows library computer

    Option 1 - Using the PrtScn button

    Use the PrtScn "PrintScreen" button, open Paint (or Paint.Net) and paste (Control P).

    Option 2 - Using the Snipping tool

    A shortcut to the snipping tool should be in the Windows All programs menu, or use Windows Search and search for Snipping.

    • Click New and note the change in the screen - it will look more faded
    • Use the mouse to select the section of the screen you wish to capture
    • Letting go of the mouse will finish the capture.

    Taking a screenshot on a Mac computer

    Take a screenshot of your whole screen

    1. Press Command (⌘) + Shift + 3 simultaneously.
    2. Find the screenshot as a .png file on your desktop.

    Take a screenshot of part of your screen

    1. Press Command (⌘) + Shift + 4. The pointer changes to a crosshair pointer.
    2. Move the crosshair pointer to where you want to start the screenshot.
    3. Drag to select an area. While dragging, you can hold the Shift key, Option key, or Space bar to change the way the selection moves.
    4. When you've selected the area you want, release your mouse or trackpad button. To cancel, press the Escape (esc) key before you release the button.
    5. Find the screenshot as a .png file on your desktop.

    Take a screenshot of a window (NOTE: This works for most windows but not all)

    1. Press Command(⌘) + Shift + 4. The pointer changes to a crosshair pointer.
    2. Press the Space bar. The pointer changes to a camera pointer.
    3. Move the camera pointer over a window to highlight it.
    4. Click your mouse or trackpad. To cancel, press the Escape (esc) key before you click.
    5. Find the screenshot as a .png file on your desktop.

    Take a screenshot of a menu

    1. Click the menu to reveal its contents.
    2. Press Command (⌘) + Shift + 4. The pointer changes to a crosshair pointer.
    3. Drag to select the menu. While dragging, you can hold the Shift key, Option key, or Space bar to change the way the selection moves.
    4. Release your mouse or trackpad button. To cancel, press the Escape (esc) key before you release the button.
    5. Find the screenshot as a .png file on your desktop.

    Take a screenshot of a menu without the title

    1. Click the menu to reveal its contents.
    2. Press Command (⌘) + Shift + 4. The pointer changes to a crosshair pointer.
    3. Press the Space bar. The pointer changes to a camera pointer.
    4. Move the camera pointer over the menu to highlight it.
    5. Click your mouse or trackpad. To cancel, press the Escape (esc) key before you click.
    6. Find the screenshot as a .png file on your desktop.

    Taking a screenshot on iPhone, iPad and iPod Touch

    1. Display whatever you want to snap on your screen.
    2. Press and hold the “Sleep/Wake” button and the “Home” button at the same time. Once it’s done, you will hear a camera shutter.
    3. Once a screenshot is captured, it will be automatically saved to your Camera Roll. You can find this by opening Albums>Camera Roll.
      NOTE: The Sleep/Wake button is on a different location on different devices. It is easiest to google the location for specific devices as needed. But it is usually on the right side, or on the top right corner of the device.Example:

    Taking a screenshot on Android devices – Ice Cream Sandwich (Android 4.0) and after

    NOTE: Screenshots can only be taken on Android 4.0 and above. Anything below this may be able to use this method, but it usually can’t. A third party app will need to be installed.
    NOTE: Always ensure you have the app you wish to capture open on the screen.

    There are three different methods to take a screenshot:

    1. Open the power menu by quickly pressing the power button. Choose the screenshot option.
    2. Hold down the volume keys and press the power button.
    3. Press the power and home buttons at the same time.

    The image will be saved in the Gallery app. Launch the Gallery app, tap on ‘Screenshots’ (it will be a named folder) and the latest screenshot will be the first on the list.
    Depending on your phone model, either tapping your ‘options’ button (may be on either side of the home button, or tapping the   or the  symbol  at the top right corner of the gallery app will give you further options of what you can do with the screenshot you have taken. You can usually email it from here, which will email it via your email app. If there is no email app set up, this will not be able to send.

    Example:

    Library members should be able to access most of the eResources from anywhere on the internet by entering their library card number and password / PIN. However there are some known issues with accessing e-resources.

    Browsers

    Some websites in our e-resources may not work so well in some older web browsers. If at all possible keep your browser up to date as this is also important for the security of your computer.

    JavaScript & Cookies

    Check your web browser (internet Explorer, Chrome, FireFox etc) settings to ensure that you haven't disabled JavaScript or  web cookies as many e-resources require JavaScript and cookies in order to function.

    Flash

    Some websites in our e-resources require Adobe Flash player in order to work. If you are using an iOS device (iPad, iPod touch, iPhone) that cannot play Flash look to see if there is an app for that site.

    Still having trouble?

    If you are using your computer at home then please contact us or fill in the technical help form.

    If you are using your computer at work, check with your IT department / person to see if you have any issues that may prevent connection. If you do, ask your IT person to email us at LibraryIT@ccc.govt.nz or fill in the technical help form.

    There are several options for getting your images off you camera for editing & sharing them.

    Please remember that if you save images to library computers they will be deleted when your session ends and you must save them somewhere else.

    Option 1: Windows' Scanner and Camera Wizard

    1. Attach the USB cable to the camera and then plug into the computer. The camera needs to be turned on to start communication between the two devices.
    2. A dialogue box should appear: click on the camera icon to start the scanner and camera wizard.
    3. Select the photos that you wish to download by clicking in the box.
    4. NB: If you have not deleted photos previously captured on the camera these photos will appear selected. Use the “clear all” button and then only select any new photos to be downloaded.
    5. Now click “Next”.
    6. At this point the camera will ask you where you wish the files to be stored. On home computers the default location for photos is “My Pictures” but you can choose any folder you like by using the “Browse” button.
    7. Once the file location has been selected, click on “Next”. The photos will now be copied onto the computer. Once this process is complete you have a number of options.
    8. Unless you wish to print directly, choose “Nothing, I’m finished..” and click “Next”. Your photos will appear in the folder location you have chosen.

    Option 2: access files via USB

    1. Attach the USB cable to the camera and then plug into the computer. The camera needs to be turned on to start communication between the two devices.
    2. To view the files on the camera go to the “Start” menu and select “My Computer”. The camera should appear as a removable disk.
    3. Double click on the removable disk and then open the DCIM folder followed by the 101MSDCF folder.
    4. This folder contains all of the photos stored on the camera. You can now “Copy and Paste” the photos over to “My pictures” or another folder on your computer. Don't “Cut and Paste” unless you want to remove them permanently from the camera's memory card.

    Option 3: access files via memory card

    1. If your camera has a memory card you can remove this and place it into the computer’s memory card slot.
    2. To view the files on the memory card you must go to the “Start” menu and select “My Computer”. The memory card should appear as a removable disk.
    3. Double click on the removable disk and then open the DCIM folder followed by the 101MSDCF folder.
    4. This folder contains all of the photos stored on the camera. You can now “Copy and Paste” the photos over to “My Pictures” or another folder on your computer. Don't “Cut and Paste” unless you want to remove them permanently from the camera's memory card.

    Some websites may have their own buttons for re-sizing text, often showing the letter A at two sizes, but if not most web browsers will increase the text size if you click Ctrl & + together, and Ctrl & - will make it smaller.

    • This will increase the text size in most web sites and in some cases the images also.
    • Resizing the text may effect how the page prints - use print preview to check and correct.

    Older browsers

    1. In Internet Explorer go to the View menu
    2. Choose Text Size > Larger or Largest

    In MS Office applications

    To view your text larger without effecting its real or printable size follow these steps:

    1. Go to the View menu
    2. Select Zoom > 200% or set your zoom size to your preference

    Yes we do. See the websites and games for fun and learning that we link to on the kids' computers at your local library. Children's computers are available at all of our branches except Diamond Harbour, Little River, Mobile Library, and Parklands.

    Yes we do.

    Find our more on our Games and Gaming page.

    Once you have sent your print job(s) to the printer they enter a queue and will not be printed until your arrive at the printer to 'release' them. You may wish to 'lock' your computer before leaving it to print your items: press 'Windows + L' to lock the PC.

    • If someone is using the printer to photocopy just wait, when they are finished you will be able to select your items and print them.
    • If you change your mind about printing a particular item after submitting it you can delete it.
    • Items not printed will simply be cleared after 24 hour hours and you will not be charged for them.

    Yes, all our libraries have printing, photocopying and scanning except the Mobile libraries.

    All the Pharos printer/copiers do colour and double-sided (duplex) printing and scanning. The public printer-copier touch panel can be adjusted to tilt forward or back depending on your requirements. The public printer-copier has a Scan to USB function.

    You will need a Pharos account to login to access the print, copy or scan functions. You will need credit on your Pharos account before you can copy or release your printing. You can top up at a customer service desk or self-service kiosk at the library

    Printing from your own device is available via Mobile Printing. Read the Mobile Printing FAQ.

    See our charges page for copying / printing costs. Scanning to Email or USB is free.

    Please note: all copying and printing is subject to copyright. It is your responsibility to ensure that your copying is legal.

    Download Printer Copier help [348KB PDF]

    The decision as to whether to use the public computers or not is yours. Here is what we do to ensure the Christchurch City Libraries' network, computers and our users are protected.

    Firewall
    To prevent malicious activity our network is behind a firewall.
    Proxy
    The internet is filtered to block viruses (and offensive content), proxy anti-virus definitions are updated as required, as a minimum this happens daily.
    Anti-virus
    The public computers have desktop anti-virus software installed, anti-virus definitions are updated as required, usually daily, and internet traffic is scanned for viruses.
    Frozen
    The public computers are "frozen": any changes made to the computers are wiped when they are restarted. This includes browsing history, temporary files, cookies, anything saved to the hard drive of the computer, including My Documents, and any potentially harmful code is removed as soon as the computer restarts.
    Approved programs are the only ones that can be used
    It is not possible to install programs (software) on the public computers. Only the programs that we have approved and installed are allowed to run.
    Windows Updates
    Microsoft critical updates are run regularly on public computers and servers.

    To change the language setting follow these steps.
    Note: you need to have the cursor in a location you can type in before you can set the language settings.

    1. Click on ENG, this is located near the bottom right of the screen on the task bar, next to the time and date, and start typing. Some languages may require you to click on additional settings once you have changed the keyboard language.

    See Also

    Zipping is used to reduce the file size and to easily transfer/email groups of related files. Zipped files may be opened and created on library computers.

    Zipped files - Opening

    In File Explorer double-click the zip files to view its contents.

    Right-Click and select extract all to copy the zip file contents to another folder.

    Zipped files - Creating

    To create a zip file right-click the file(s) you wish to zip and select Send to compressed (zipped) folder.

    Public use library computers have the following software installed:

    Windows

    • Windows Accessibility tools including Magnifier: Microsoft screen magnifying software, and Narrator: Microsoft light-duty screen reader utility.
    • Pharos Account Balance: View the balance on Pharos account, required for printing & copying.
    • Māori keyboard and dictionary
    • Multiple keyboard languages supported

    Web Browsers

    • Microsoft Edge: Web browser
    • Firefox: Web browser
    • Google Chrome: Web browser

    Office

    • Microsoft Office: Suite of programmes including word processor, slideshow, spreadsheet and more. (Word, Excel, PowerPoint and OneNote).

    From September 2025 library computers will not have Microsoft Publisher installed. Microsoft is discontinuing this application. See Scribus instead.

    • Scribus: Desktop publishing application that can import Microsoft Publisher files.

    Other programs include

    • Audacity: Audio editing software.
    • Inkscape: Drawing programme
    • iTunes: Music library software.
    • Media Player: for audio and video files
    • Microsoft Clipchamp: free video editing tool, requires a personal Microsoft account login
    • Notepad++: Text tool
    • Paint.net: Drawing programme
    • PDF-Xchange: Open, read, create & edit PDF files
    • VLC: Multi-format video player.

    Learning Centre computers

    The following software applications are used during Learning Centre programmes (i.e. available during organised classes and creative drop-in sessions).

    • Affinity Designer: vector graphics editor Adobe Illustrator alternative
    • Affinity Photo: raster graphics editor Adobe Photoshop alternative
    • Affinity Publisher: desktop publishing application Adobe InDesign alternative
    • Arduino IDE: coding for Arduino boards
    • Blender: 3D computer graphics
    • Krita – digital painting
    • League of Legends – eSports  
    • Minecraft Education Edition
    • OBS Studio: Desktop video recording and live streaming software
    • PrusaSlicer: 3D printing design
    • Silhouette: crafting tool
    • Vital: Create your own custom sounds with Vital, a digital synthesizer.

    See also:

    Library staff will try to help you, but they are not trained in all programs. Talk to a library staff member if:

    Staff can provide assistance with:

    • logging on;
    • opening and saving files;
    • some assistance with formatting Word documents;
    • some assistance with creating an email account.

    Reporting problems

    If you experience technical problems with one of our public computers, talk to a library staff member or fill out our technical assistance form. If necessary, Library staff can report technical issues to the LibraryIT help desk team.

    Te Reo Māori uses macrons over vowels to indicate vowel length. The following are installed on library computers to assist with using Te Reo:

    • New Zealand Māori macron keyboard definition: examples of Māori macrons: Ā ā Ē ē Ī ī Ō ō Ū ū.
    • Māori dictionary plug-ins for use with Microsoft Office and Open Office.

    To insert a macron above a vowel, do the following:

    1. Press and release the tilde ~ key (first key in the numbers row, top left on the keyboard + Shift);
    2. Press the vowel key;
    3. The vowel appears with a macron, for example ā.

    Follow the steps below to save your files to a writeable CD or DVD.

    1. Place a writable CD or DVD in the optical drive.
    2. Open File Explorer.
    3. Click on disk drive X: and select CD/DVD player (Please note: Once burnt you can’t edit or save any more data - saving to a USB may be a better option).
    4.  Add a disk title, select CD/DVD option, and hit Next.
    5. Wait until disk is prepared/formatted.
    6. Copy files and save to the disk
    7. Remove disk - May take a minute while this completes the task.

    See also

    To access your files on your USB flash drive or memory card

    There are USB ports and a memory card port on the side of the public computer monitor.

    Once you insert your drive or card File Explorer will open automatically or you can open File Explorer from the desktop menu.

    Drive F: is the default drive letter your flash drive or memory card will usually be assigned.  

    To safely remove your USB flash drive

    • In the bottom right corner of the screen click on the USB Flash drive icon
    • Select Eject (name of your device) 


    • A message appears when it is safe to remove your device.

    * If you don't have one you can purchase a USB flash drive at our libraries, just ask at the information desk.

    While you can temporarily save documents that you are working on to a library computer it will be permanently deleted when the computer restarts at the end of the session.

    To save your work:

    • Email the file to your email address as an attachment if you have access to webmail, eg., gmail.com or outlook.com
    • Save the file a USB flash - All library computers have USB ports to plug in a USB flash drive
    • Save the file online to a web based file hosting service. Free options are available. You will need an email address to register with the hosting service
    • Save to a SD memory card - All library computers have a SD memory card reader
    • Save to a writeable CD or DVD - All library computers have an optical drive which can write to writeable CD or DVD disks.
  • Accessibility

    If you've received the message "You have been suspended for downloading too much data, please try again later" you have exceeded the total download limit we've set for remote users of our eResources.

    We've set this limit to comply with content provider requests, minimise the potential for the illicit download of large amounts of content, and limit reductions in access speed.

    Please contact us and we can take a look at your specific usage requirements.


    Accessibility

    Accessibility, when referring to the design of software, refers to the practice of designing software so that people of all abilities and disabilities have equal access to information and functionality. Some software is specifically designed to make other software accessible to users who, for example, are sight-impaired for example. The following accessibility tools are available on our computers:

    Dyslexia

    The OpenDyslexic font is installed on our public computers. On a Free Internet public computer you can create or edit a document and use OpenDyslexic from the available fonts menu.

    The OpenDyslexic Chrome extension is installed on our public computers. To activate in the Chrome web browser select the extensions tool bar icon (it looks like a jigsaw puzzle on the right-side of the address bar), then select OpenDyslexic.

    Magnifier

    Magnifier is included as part of Windows. Magnifier splits the window you are viewing into two; the top half of the window displays the selected text in a larger font.

    • To use magnifier, go to Start > All Programs > Accessories > Ease of Access > Magnifier.
    • To quit, click Exit or press Alt-X.

    Is screen magnification software installed on the public PCs?

    Yes. Magnifying Glass software is installed to assist people with visual disabilities.

    • To use it go to Start > All Programs > Accessories > Ease of Access > Magnifying Glass.
    • To exit from, or restart Magnifying Glass use the keyboard shortcut Ctrl-ALT-G.

    To change options such as the zoom level and size, right-click the Magnifying Glass icon in the system tray in the bottom right corner of your screen.

    Help is available from Microsoft.

    Narrator

    Narrator is a screen reader utility included in Microsoft Windows. The visually impaired can use it to read dialogue boxes and window controls.

    To use Narrator, go to Start > Programs > Accessories > Ease of Access > Narrator.

    See also:

  • Email

  • Internet

    Yes. Christchurch City Libraries provides a mobile printing service. All Christchurch City Libraries (except Diamond Harbour and Little River) support Mobile Printing. The Mobile Library bus does not provide a public printing or mobile printing service.

    Visit the Mobile Print Website

    Prerequisites

    Process

    Printing from your own device is a two-step process. First you need to upload or email the document. Second you need to release the document from a public printer.

    Upload to Print

    • Log on to the Mobile Print website using your library card or visitor pass and PIN
    • From the Job List tab select Upload
    • Browse and select the document you wish to upload
    • Click the Refresh button to update the Job List screen
    • Once the document is successfully uploaded you have the ability to change print options
    • Your document is now ready to be released from a public printer

    See Top Tips for Mobile Printing

    Email to Print instructions

    1. Email the document you wish to print as an attachment to printbw@ccc.govt.nz.
    2. You may receive a reply email with the subject line “please complete your email registration” - click on the link in the email in order to complete this process.
    3. Wait for an email confirmation that the job has been successfully received.
    4. Send one email per attachment.
    5. You can modify some printing options by logging into our Mobile Print Website.
    6. When you visit a Christchurch City Libraries branch (except Diamond Harbour, Little River or the Mobile Library bus) you need to log on to the public printer to release your print job(s).
    7. If you do not release your printing on the day you send it or upload it be aware it is automatically deleted at midnight (visitor account) or after 24 hours (library member account).

    Next step - visit a Christchurch City Libraries branch (except Diamond Harbour, Little River or the Mobile Library bus) and log on to the public printer to release your printing.

    See also Top Tips for Mobile Printing.

    Default print options for Email to Print

    Documents emailed to printbw@ccc.govt.nz will have the following attributes

    • Black and White
    • Double-sided

    To change print options you can either log into our Mobile Print Website OR use one of the email addresses listed below to set the following:

    Documents emailed to printbw1@ccc.govt.nz

    • Black and White
    • Single-sided

    Documents emailed to printcl@ccc.govt.nz

    • Colour
    • Double-sided

    Documents emailed to printcl1@ccc.govt.nz

    • Colour
    • Single-sided

    Top Tips for using the Mobile Print Website

    • The Mobile Print website displays your documents that are ready to print, including any printing you have done from public computers which have not been released yet.
    • You can modify some printing options via the Mobile Print website on documents that have been uploaded or sent by email only.
    • Documents not released are automatically deleted at midnight (Visitor printing) or after 24 hours (Library members).
    • You can use the Job List to identify the cost of individual print jobs, multiple print jobs or you can select all documents to tally the total cost of printing.
    • You can also view your Pharos account balance from the Mobile Print website under Payment Method.
    • The Mobile Print website is no longer compatible with Internet Explorer 11 or older.

    How to change print options in Mobile Print

    1. Log on to the Christchurch City Libraries Mobile Print Website using your library card or visitor pass and PIN.
    2. In the Job List view tick the box next to document you wish to change
    3. Under Print options you can now make changes to the following:
      • Colour or Black and White
      • Single Sided or Double Sided
      • Pages per side
      • Copies
      • Page range - when you release the document it is deleted from your Job List queue. You would need to upload or send the document again to print additional pages of the same document.

    Supported Document Types

    Christchurch City Libraries Mobile Printing service currently supports these file types

    • Microsoft Word
    • Microsoft Excel
    • Microsoft PowerPoint
    • Microsoft Publisher
    • Microsoft Visio
    • Adobe Portable Document Format (PDF)
    • Text (CSV, RTF & TXT)
    • Images (JPG, TIFF, GIF, BMP)
    • Open Office 4.0 or greater documents

    Mobile Printing Apps

    Install

    Search for Pharos Print at the Apple App Store or Google Play Store.

    Settings

    Server Address: print.christchurchcitylibraries.com
    Port: 443

    Contactless printing using QR Code

    From within the Pharos App, scan the QR code located at your library’s public printer to release your printing.

    QR feature is available on:

    • Apple iOS - 13.0 and up
    • Android - 4.0.3 and up

    These sites are often hoaxes and should be ignored. Try closing the web browser (Internet Explorer or Firefox) or restarting the computer (make sure that you save your work first or it may be deleted).

    If you feel there is a technical problem please advise a librarian.

    All our libraries, with the exception of the Mobile Library, provide free internet access to the public via wifi and/or desktop computers.

  • Wifi

    • You should be automatically directed to our WiFi welcome page.
    • You need to accept our terms and conditions before you proceed with using this service.

    Troubleshooting

    • Open a web browser such as Chrome, Edge, Firefox or Safari
    • Search or enter a website address that is not already displaying in the web browser, eg http://1.1.1.1
    • This should force the web browser to redirect to the Christchurch City Libraries WiFi welcome page

    Use web-based email or “webmail” to send emails.  Sending from an email application such as Microsoft Outlook or the Gmail App is not supported on the Christchurch City Libraries WiFi.

    The WiFi service is free and open.
    We do not recommend using the service for confidential transactions.
    You are responsible for the security of your computer and your data.
    You are also responsible for the physical security of your belongings while in the library. Please do not leave your computer unattended.

    • The WiFi service is available at all our libraries including the Mobile Library
    • The WiFi service is available 24 hours a day 7 days a week excluding the Mobile Library and subject to outages and unscheduled maintenance
    • Our WiFi Terms of Use on our WiFi Welcome page and our Internet Use Policy detail the Christchurch City Libraries acceptable use policy.
    • HTTP and HTTPS standard website browsing are allowed. All other network ports or protocols may be blocked eg SMTP and FTP are blocked
    • Your WiFi session is configured to give two hours of continuous service after which you may be re-directed back to the Welcome page in order to continue browsing
    • Because you are connected to an open WiFi network your device’s policy may require re-connection more often - particularly if the network connection becomes idle
    • There are no quotas on the total amount of data you can upload or download at any of our libraries
    • Tūranga - a 30 Mbps (Megabits per second) upload and download bandwidth limit apply