Holiday activities
Our librarians have put together crafts and fun activities you can do at home for the school holidays - or any time!

Matariki activity book for kids

Learn how to make a paper star box for Matariki

Matariki star art weaving

Matariki craft: Origami mini stars
Matariki activity book for kids
Learn how to make a paper star box for Matariki
Matariki star art weaving
Matariki craft: Origami mini stars
Multicultural Crafts

Samoan alphabet zine
Pipecleaner seis
Rotuma language pyramid
Rotuma language cube
Ei katu colouring in
Diversity Awareness Month paper doll craft: Mexico
Diversity Awareness Month paper doll craft: China
Diversity Awareness Month paper doll craft: Japan
New Zealand Chinese Language Week Craft – Chinese Fan
The Filipino Salakot
Tokelau Language Week Craft - Taulima
Niue Language Week Craft - Kahoa
Fijian salusalu craft - Fijian Language Week
Filipino Traditional Clothing: Barong Tagalog & Baro’t Saya
智趣文化-中国的传统服饰 - Chinese traditional clothing
Tuvaluan Ili Craft - Tuvalu Language Week

Te Wiki o Te Reo Māori Challenges 2021 – Stand together

Te Wiki o Te Reo Māori Challenges 2021 – Overcome fears

Te Wiki o Te Reo Māori Challenges 2021 – Get grounded

Challenges for Te Wiki o te Reo Māori 2021 - Get talking
Te Wiki o Te Reo Māori Challenges 2021 – Stand together
Te Wiki o Te Reo Māori Challenges 2021 – Overcome fears
Te Wiki o Te Reo Māori Challenges 2021 – Get grounded
Challenges for Te Wiki o te Reo Māori 2021 - Get talking
SPRING CRAFTS
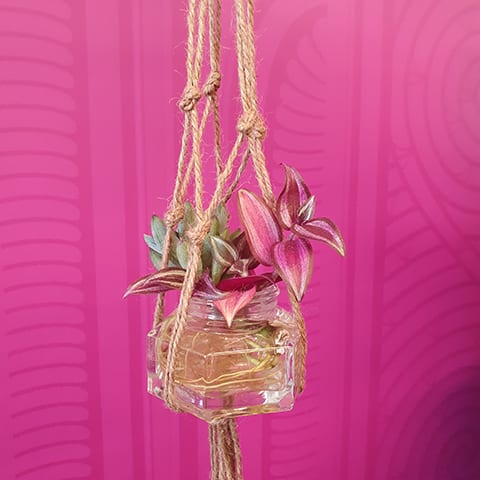
Macramé Pot Holder
Master macramé and jazz up your space!
View the instructions [2MB PDF]
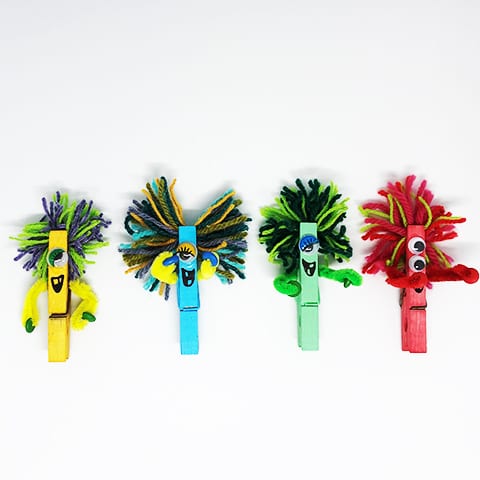
Peg Monster Magnets
Create a woolly peg monster to manage the mayhem!
View the instructions [2MB PDF]
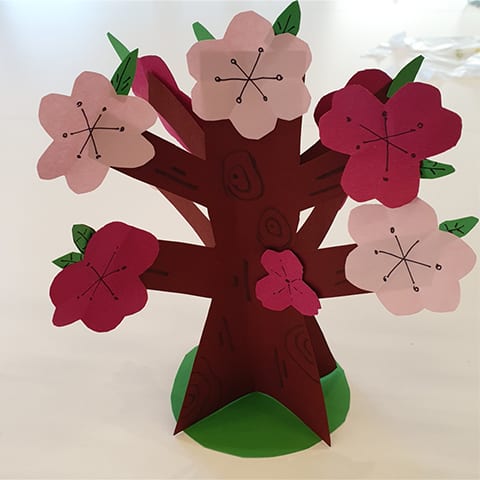
Spring Blossoms
For a bloomin’ good time, make:
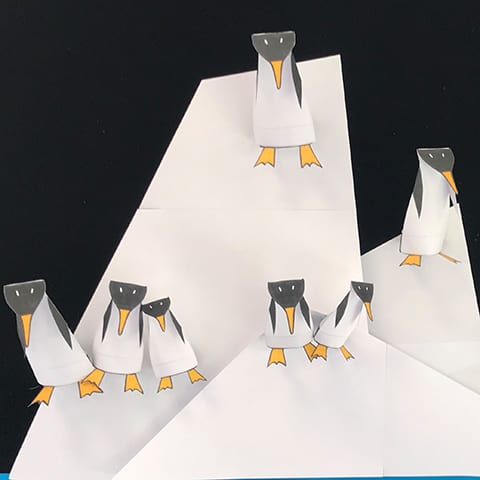
Paper Penguin
Make your own paper penguin parade.
View the instructions [1MB PDF]
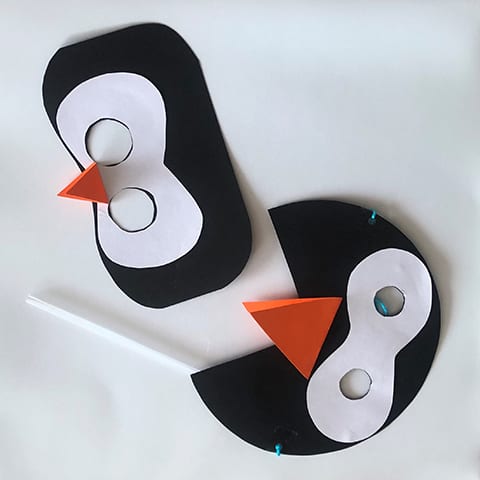
Penguin Mask
Masquerade as a penguin!
View the instructions [2MB PDF]
AUTUMN
Paper Craft Hedgehogs

Whoooo would like to create a woodland creature from paper and autumn leaves?
What you will need:
- Paper
- Coloured pencils
- Book covers
- Old magazines
- Any other materials that can be cut into flat leaves
- Scissors
- Glue
- Black felt
- Printer (optional - to print templates)
- Cut out the hedgehog shape either using the hedgehog template or drawing one yourself. If on white paper, colour the hedgehog shape brown (or any colour you want).
- Cut out different sized leaves on different materials. You could colour in some yourself, use some book covers to get a variety of colours and make use of old magazines.
- Begin gluing the leaves onto the hedgehog, ensuring to leave space for the head.
- Once all leaves have been glued on, draw an eye and a nose.
Templates: Click on templates to open, then click save as to your computer, the downloaded file will be A4 size for printing
Hedgehog:

Leaves:

Paper Craft Owls

What you will need:
- White or coloured card/paper
- Coloured pencils
- Pens
- Scissors
- Glue (PVA or hot glue)
- Autumn leaves (gather from your garden or neighbourhood)
- Printer (optional - to print templates)
- Print the Owl template below out in black on coloured card/paper.
- Cut out body, eyes and beak.

3. Add markings on the eyes, or colour if on white card/paper.

4. Stick eyes and beak on owl body.

5. Choose large leaves for wings and smaller ones for ears or feet.

6. Use a blob of glue to stick wings on the front of your owl.

7. Use a blob of glue to stick the ears and feet on the back of your owl.

Finished! You could make a parliament of owls for your display.

Templates: Click on template to open (note: the owl template may not show on the preview, click on the black screen), then click save as to your computer, the downloaded file will be A4 size for printing (you will be able to view the template when you go to print)
Owl:

Stained Glass Leaves
Catch the sun with a colourful leafy craft to hang in the window.
What you will need:
- Coloured card/paper
- Pencil
- Scissors
- Self adhesive contact paper
- Cellophane or real leaves
- Sellotape (optional)
- Hole Punch (optional)
- String (optional)
- Draw the outline of a leaf onto your card or paper and cut out.


2. Cut out x2 sheets of contact paper slightly bigger than your leaf size.

3. Take x1 sheet of the contact paper removing the backing and place your leaf shape on the sticky side (sticky side up).

4. Stick scraps of cellophane or real leaves inside your leaf shape.

5. Take your other sheet of the contact paper removing the backing and place over your leaf (sticky side down).

6. Cut around the outside of the leaf shape.

7. Use a hole punch or sellotape to attach string. Hang in your window to catch the colours.

Tea Light Jars
Upcycle a jar and create some autumn ambience! Bring a clean glass jar.
What you will need:
- Clean glass jar
- Real leaves or leaves made from crepe/tissue paper
- Scissors
- Twine or String
- Glue
- LED tea light candle
- Paper/card (optional to print out leaves template)
- Printer (optional to print out leaves template)
- Draw some leaf shapes on your crepe/tissue paper, print out the leaves template below, use real leaves, or mixture. Cut out multiple shapes.


2. Use a small amount of glue on either the inside or outside of your jar. Sticking one leaf at a time, until your jar is covered.

3. For a final touch wrap your twine or string around the top of your jar.

4. Pop in your LED tea light candle to finish it all off.

